Sunday, 28 October 2012

First Quilts - DQ Bhavani

(Guest post by DQ Bhavani, the 4th in our series of 'First Quilts')

Hello DQs

Here is my first quilt. I started thinking about it a couple of months ago, then I joined DQ, which was inspiring enough to get me started.


I am thrilled about completing this baby quilt. It measures 60x 42 inches and is made up of my 14 month old daughter's first year clothes. Both my twins lived their first year in bodysuits and sleepsuits. So all their clothes are made of hosiery material, which is not the ideal quilting fabric, I understand. But for me it was about preserving their beautiful clothes so that some day they will look at the pieces and ask me about each dress they wore. Cant wait :).


I loved the experience of quilting, I know I will be doing a lot more of this craft in the coming years. I also know I will not be working with this fabric ever again, it was a nightmare and the end result is stretchy and not so neat.

-Bhavani

Wednesday, 24 October 2012

Covet the Black Beauty

Covet the Black Beauty, the absolutely drool-worthy Bernette E46 from BERNINA ?


Here's your chance to win her !


Tuesday, 23 October 2012

Sudha's Chevron Tote QAL - Part 1

We have with us the very talented sewist,  DQ Sudha, who is doing a very entertaining  informative QAL on making chevrons from striped fabrics and then turning those chevvies into snazzy totes. Do check out her pages TheBowtiqueShop and Madras Motif to have a dekko at her work. Over to Sudha...

I should be banned from Pinterest. For looking up Chevron print items (read bags, dress, and what not.!) And now I am engulfed with this pattern. Despite the popular zig-zag trend, Chevron patterned fabric is hard to come by. But with simple quilting techniques, we can make our own! Yes, WE CAN.! I tried my own take on it and created a comprehensive tutorial to share with you guys. Hope I make sense, and your brains dont zig-zag on me.! Here goes:

Okay…..basically, you take striped fabric, cut bias strips in two different directions, and sew them together to create a zigzag chevron! I know, I know, no big deal. This fabric pattern can then be used into loads of projects like curtains, wall hangings, clothings, quilts, pillow/cushion covers. And this time around I am going to show you how to make a tote bag out of this fabric. Stay with me.

NOTE: Now for this QAL, I tried to work with a couple of varieties of stripes, some broad stripes, some thin stripes and some multi-coloured stripes. Each gives a different look. Each pretty. As a beginner, I would suggest using two colored stripes. With three or more colored stripes, not every strip matches up easily with its counter strip. You will require more amount of fabric when using multi color. For example – white, red, blue stripes when flipped will have blue, red white. Now that will be difficult to match. Difficult and not impossible. :)

You will need:

- Approximately 3/4th yard (For this bag only my front is Chevron pattern, the back is plain old stripes. So the 3/4th is for the front alone.)

- Your fancy-schmancy cutting tools - rotary cutter, mats or just plain old ruler and scissors like moi.!

Lets get started. The hardest part of this project is cutting strips at 45 degree angle. For this you will be cutting on bias. (Not hard enough.!, considering you guys are quilters.!)

PROCEDURE

Lay up your fabric nice and flat. Fold in the centre. Now from the fold, mark lines at 45 degrees and snip, snip, snip. Picture always helps, see below. Now you can always cut the diagonal strips and then cut the centre (the fold). I cut on the fold first, and then cut the strips. I would pin it aplenty to be on safe side so that the fabrics dont slip away and go all wonky. My strips were 2.5". You could try any width. Each width gives a different look. If you cut less than 2'' you will end up with very pointy narrow “V”.


And now pat yourself at the back. You have now overcome the main herculean task of this project. Grab a bite:


Oops sorry that wasn't meant to appear here. Anyways, with one cookie tucked in, lets proceed to the fun part - sewing.! Grab two strips, one of each direction and lay them together right side facing in. Its a beauty to work with stripes, all you need to do is match up the stripes, easy peasy. Pin it. Since we cut it on bias, the fabric might be a bit stretchy. So pin them up so the chevron doesn't go wonky on you. And sew: Made sense? Piece two pieces to form the perfect V.


Keep adding till you exhaust your strips. Then take out your iron box and press the seam flat. You can open up the seam and press flat. But thats too much of work for me. So I just press all the seam towards one direction.And lo behold you have made your own Chevron pattern fabric:


There, thats the finished Chevron piece, square it up nice and sharp, and it is ready to work with. Have it ready, before I hit you with next tutorial, where we actually make the bag. I shall list out the requirements for making the bag, so you have it all ready when we actually start tote-ing :)
Things you will need:
-Your Chevron print. (for the front)
-The original stripes fabric the same size as you chevron pattern. (For the back)
-Contrast Lining fabric to match up your exterior. You can use plain colors itself, but I like the idea of mixing prints and textures.
-Thick or medium weight Iron-on Canvas (easily available in any basic sewing supply store. Also called the bakram) It is shiny on one side. To fuse it to fabric, place the wrong side of fabric on the shiny side of canvas and press. It takes a long time to stick together, so press nice and hold for couple of minutes.
-Leather or belt for straps. I just recycled an old belt that I picked during some sales..!!

Thats just it..!! See you in say 10 days..!!!

Monday, 22 October 2012

Prasanna, the Sunny Bee


Hello busy bee's,

Am in Chennai for 3 months for my vacation. When I saw the name SUNNY BEE I immediately thought about winter in Boston. Am going back on December and it's gonna be freaking cold. Keeping this on mind I wanted my quilt with a sun. But why one when I can get twenty??
Think my winter is going to be warm this time :)))))))...Yipppppeeeeeeeeeeeee....

Oh BTW my name means sunshine and happiness..That's another reason for this quilt ...

This is my first quilt, So giving instructions is a really challenging task for me:)...Hope everyone is able to get it clearly.

I need to mention that I got inspired by Geoff's mom sunny days pattern.

FABRICS AND COLORS:

100% cotton printed fabric – small prints in shades of yellow,red or orange ONLY.
Plain Black 100% cotton fabric(Please make sure that the black doesn't bleed)

 No No's:

No scrap bits (means you cannot put different fabrics in the same block. Use only one type of printed fabric for the whole block)
No embellishments
No polka dots
No stripes
No handloom fabrics

MEASUREMENTS:

CENTER BLOCK:
Size - 8x8 in printed fabric – 1 no.
Corners in center block – 2x2 in black – 4 no's

HOUR GLASS BLOCK:
6x6 in black – 2 no's
6x6 in printed – 2 no's

RECTANGLE BLOCK
2x5 in black – 8 no's
2x2 in printed – 8 no's

CORNER BLOCK
5x5 in black – 4 no's.

Your finished block should be 16.5x16.5

 INSTRUCTIONS:

  1. Finish the center block aka snowball block. For this you need the 8x8 printed fabric and 2x2 black (check the reference link no 2).
  2. Next is the rectangle block. For this you need 2x5 black and 2x2 printed fabric (similar to snowball). Attach the printed fabric to the bottom of the black and stitch diagonally.
  3. Then the hourglass block. For this you need 6x6 black and 6x6 printed fabrics (check the reference video link no 1). Your Finished block should be 5x5.

TO ASSEMBLE:

For the first row take a corner 5x5 black piece and attach it with the 2x5 rectangle followed by the hourglass and then rectangle again and finally another corner black block.
For the second row take a hourglass and attach it with the center block and then another hourglass.
For the third row follow the same instructions like the first row.

Finally attach everything, square it up and you will get a 16.5x16.5 block.

 REFERENCE VIDEOS:

I thought this will be very helpful for new bee's like me. You will get an idea for making your hourglass block and the snowball block.


I made a sample block to see whether my instructions and measurements were right. Am attaching the picture of my block. If anything is unclear please feel free to call/mail me.I will add another picture of my finished block.


A big thanks in advance to everyone.
- Pressi

Sunday, 21 October 2012

First Quilts - DQ Chumkie

(Guest post by DQ Chumkie, the 3rd in our series of 'First Quilts')

My First Quilt


Here is my first queen-size quilt, made in my first quilting class. The pattern is called Sunshine and Shadows. The squares adjacent to the white squares have some red in them, which the camera didn't pick up, so it isn't completely monochromatic.


It took 4 weeks to complete the top. I took a follow-up class to learn how to pick and piece a backing,  layering and basting the three layers, and took another class in hand quilting.

I initially started out machine quilting it, but since I was working with an old, old sewing machine which didn't have a walking foot, I gave that up in a hurry! It took me 3 years to complete hand-quilting this quilt!

There was enough material on the back of the quilt which allowed me to fold it over to the front to simulate binding.

This quilt was started in March 1991 and finished in September 1994. It was a very challenging first quilt and my advice to beginner quilters would be to start small because there’s no greater satisfaction and inspiration than to walk away from a class with a finished quilt.

This quilt was gifted to Son #2 a number of years ago, is used daily and still covers his and his wife’s bed.

- Chumkie

Saturday, 20 October 2012

Amalie's Patchwork Ball QAL - Gallery

Next in our series of Desi QALs (Quilt-Alongs), DQ Amalie showed us two versions of making  patchwork balls, QAL#1 using Pentagons and QAL#2 using Triangles. Great ideas for conjuring up quick li'l gifts.

Here's to prove our DQs had a ball..!

Tina

Agnes

Gayathri

Damayanthi

Aliya

Sudha

Brinda

Nikhat

Nirmala

Tina

Thank you for the lovely QAL, Amalie.

Oh, here are Amalie's balls (hee hee)..


Cuteness !!


Friday, 19 October 2012

DQ September'12 Challenge - Winner

Of the 14 lovely entries to the September 2012 Challenge, here are the three voted finalists...

Brinda


Tina


Kalindi

With three equally awesome entries, am glad it was left to Mr.Random Number Generator to choose the winner! And the chosen one is lovely DQ Brinda's lovely Owl Wall Hanging !!

She wins these lovely goodies from our sponsors BERNINA India:

The nifty Bernina tool..
..and a current issue of the BERNINA ' Inspiration ' magazine, full of creative inspirational ideas and DIY projects..

Congratulations Brinda! Thank you Bernina !


Saturday, 6 October 2012

DQ Meet, Pune (28.09.12)

(Meet report filed by the hostess, the ever gracious DQ Vidya1)

Desi Quilters meet in Poona...........

Friday the 28th of September  2012

Within a few minutes of arriving, this was the scene !


At 1030 the first DQ arrived followed in quick succession by the other five. One by one WIPs, completed projects , UFO's got pulled out of bags and the buzz began.....
Kausalya showed us her ever-so-neat hand quilted cushion covers, her first quilted project


Then after all the oohs and aahs Charu got her UFOs out....another round of ooh-ing and aah-ing, because she had made large log cabin blocks in single coloured solids so the seams were the focal point. Interesting, almost architectural pictures. Charu also showed us a UFO that her daughter had started with really beautiful fabric !! Pratibha asked them to put away their professional looking projects so she could take out what she called amateurish work. Amateurish it most certainly was not ! An almost complete, beautiful, complicated 9 square block bedspread in pastel aquas and yellows, prints and solids. And of course her patchwork totes....those were smart and complete. And another set of blocks she had 'stringed' to make a bedspread. Pratibha is self taught and doesn't have the tools or know quilting terminology yet, but she has produced such lovely work !
Tanuja had brought her crochet evening bags, since she had no quilting projects with her....naturally all of us were totally 'diggin' those !
Riddhi's whole cloth quilt project for the DQ September challenge arrived just then...Its so much prettier in real life ! And her shoe bags and make up pouches were a brilliant 'gift' idea especially now with the festive season beginning soon.
Out of Kalindi's big bag of completed work came out magic ! Exquisite Japanese style purses, key holders, handbags and totes all painstakingly hand pieced and quilted...they have to be seen to be believed ! Oh yes, she did have one WIP, and that was not hand quilted but she was doing machine embroidery and FMQ. Its a wall hanging..a piece of art. We found out that she's an art student. Figures :)
( L to R) Kalindi,Pratibha, Kausalya and Tanuja

Riddhi, Charu, Pratibha and Kalindi


Tanuja about to pop in a kheer kadam before rushing to catch her flight !


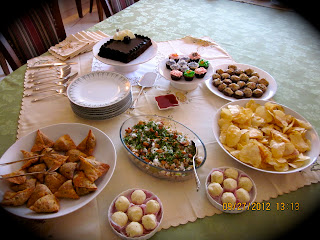
By this time everyone was hungry and thirsty so we broke for tea....pretty mini cupcakes made by Riddhi, stuffed mushrooms made by Tanuja, kheer kadams that Kalindi had brought along and .....


Once we were done eating we went back to our chatting about quilting tips, ideas, tools and plans.
Four hours later we stopped but only after deciding that this was going to be a regular 'once a month' meeting, that we'd plan the next one so we had some sort of structure and learned something new or polished what we already knew. Kausalya had showed us how to cut 'whirly gig blocks the easy way and Kalindi showed us how to tie a 'posh' knot when hand quilting :) Very essential.

What was really nice was that everyone got on famously and was very willing to share and that I think is what quilting is all about.
All in all it was a fun morning and the DQs left happy and with a small needlebook to remind them of our first meet !

Any regrets ?? Just wish I'd taken more pictures !! Ah well there's always a 'next time' :)
-Vidya

Friday, 5 October 2012

DQ October '12 Challenge

The response and excitement for the September challenge were awesome! And now, to take the challenge forward, we go from wholecloth to strips. Here are the rules for the October Challenge:


1. Make a STRIP QUILTED item of any size

2. Creativity counts

3. Post your entry in this doc as well as the challenge album.

(The first person to finish the challenge, creates the challenge album)

4. Post it BEFORE 6 PM IST, 31st October 2012


Remember, in order to qualify for a shot at the bumper Diwali (Nov) challenge prize, the Bernette 46, you need to participate in AT LEAST one other challenge. So, if you havent yet, then this is the perfect opportunity. Calling all newbies...the challenge can't get simpler than this ! (And please do ask google for help.)

And the prizes?

Our sponsors BERNINA India will be giving away the following items to one lucky winner:


A BERNINA ' Pin Holder '...


... alongwith a BERNINA ' Magnetic Bobbin Holder '...


..and a current issue of the BERNINA ' Inspiration ' magazine, full of creative inspirational ideas and DIY projects


Let the battle begin...


Monday, 1 October 2012

DQ September '12 Challenge - Entries

September was just awesome!! 14 lovely entries with a nail biting finish ! The excitement on the DQ page at the time of the challenge deadline could've easily rivaled that of a derby ! Whew !!

A quick recap of the September '12 rules:

1.Make a wholecloth quilt, not smaller than 24"x18"
2.Use any quilting technique as long as the top is one single piece
3.Your entry is valid ONLY if entered in the doc here as well as posted in the Challenge album

Truth be told, DQs have outdone themselves this month. There were quite a few first time participants and that is sooo heart warming. Without further ado, here are the lovely lovely lovely entries. Just lovely.

1.Riddhi Kapoor
My piece is 20"x24", hand quilted. embroidery with ribbon flowers on khadi silk with polyester filling


2. Brinda Crishna
www.embroideringmytale.blogspot.com
18" X24 ". Machine quilted


3. Manju Narain
My Experiment with ‘Kantha’, Size : 18”x24”
Kantha is a traditional hand embroidery style from West Bengal. It is mainly running stitch embroidered on sarees, dupattas and even used for quilting a few layers of fabric together. This form has always fascinated me and I thought the ‘ one piece quilt challenge’ would be good place to play with it and make something small as it takes forever to do. So here is my interpretation of it! I have used silk fabric for the top, the backing is cotton and the filling is polyester fiber.


4.Tina
Birds of a feather - FMQed wholecloth quilt 60"x90"
More pics at.. https://www.facebook.com/media/set/?set=a.483608478337441.112794.100000648790796&type=1


5.Medha
African folk art, applique and FMQ


6.Nirmala
Size 30"X28" Whole cloth quilt with some hand and machined work on it.


7. Sudha
Size - 50"X40" Whole cloth hand quilted inspired by color-block and kantha. More pics at - http://www.facebook.com/media/set/?set=a.10151112096623897.452317.597858896&type=1


8. Elvira Threeyama
Wholecloth quilted table runner. Size: 18 x 35


9. Prasanna Narasimhan
Wholecloth quilt with peacock applique.. Size - 24"x24"


10. Agnes Dyah Wijayanti
Wholecloth quilt in a form of table runner, size 18"x44", the flowers are hand embroidered and the rest is machine quilted


11.Damayanthi bhat
Wholecloth quilt made by stippling technique, size 24 " X 24 "


12.Kalindi Hambir
Oleti , size 38" x 24"
This is single piece machine applique and machine quilted Quilt.


13.Aliya Mir


14.Veena


Three best entries will be decided by votes and one lucky winner among them, by lots. Thank you BERNINA India, for sponsoring the prizes and adding that zest to the Challenge !